Our Seasonal Calendar gamification feature is a fun and effective feature for engaging and retaining your audience through daily interactions and exclusive offers.
The Seasonal Calendar is especially relevant during holiday seasons, such as Christmas or Black Friday/Week, but can be used to promote any daily offers you might be running throughout the year, such as:
- Valentine’s Day offers;
- Easter sales;
- Halloween deals;
- Weekend-only campaigns;
- And much more.
To get started, select the “Collect Email Addresses” campaign type, and then “Gamification” in the template filtering in the left-hand menu. Now you can choose one of our templates or you can build the calendar from scratch, like we will do in this example.
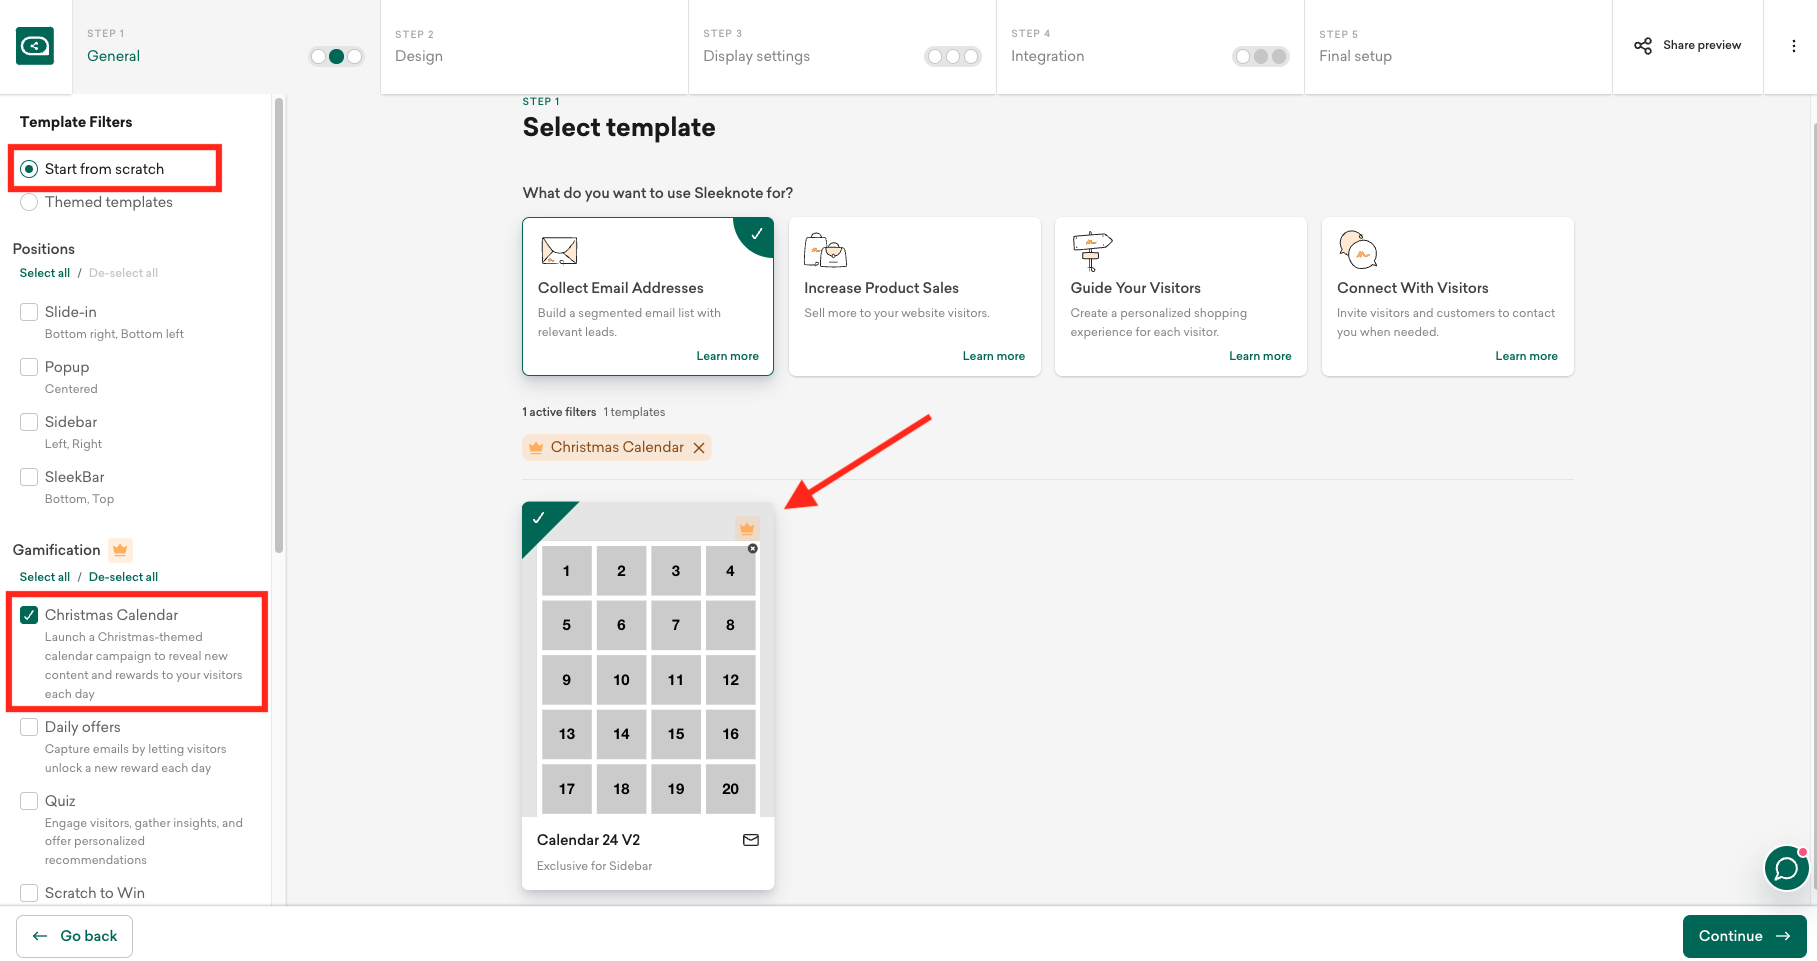
Click “Continue” and choose the position you want, and move to the Design step.
Design your calendar
The calendar design includes a Form, a Calendar, and a Teaser. The form will display as an overlay and the visitors will have to submit their email address to unlock the calendar doors. They only need to submit the email once to be able to return and open a new door each day.
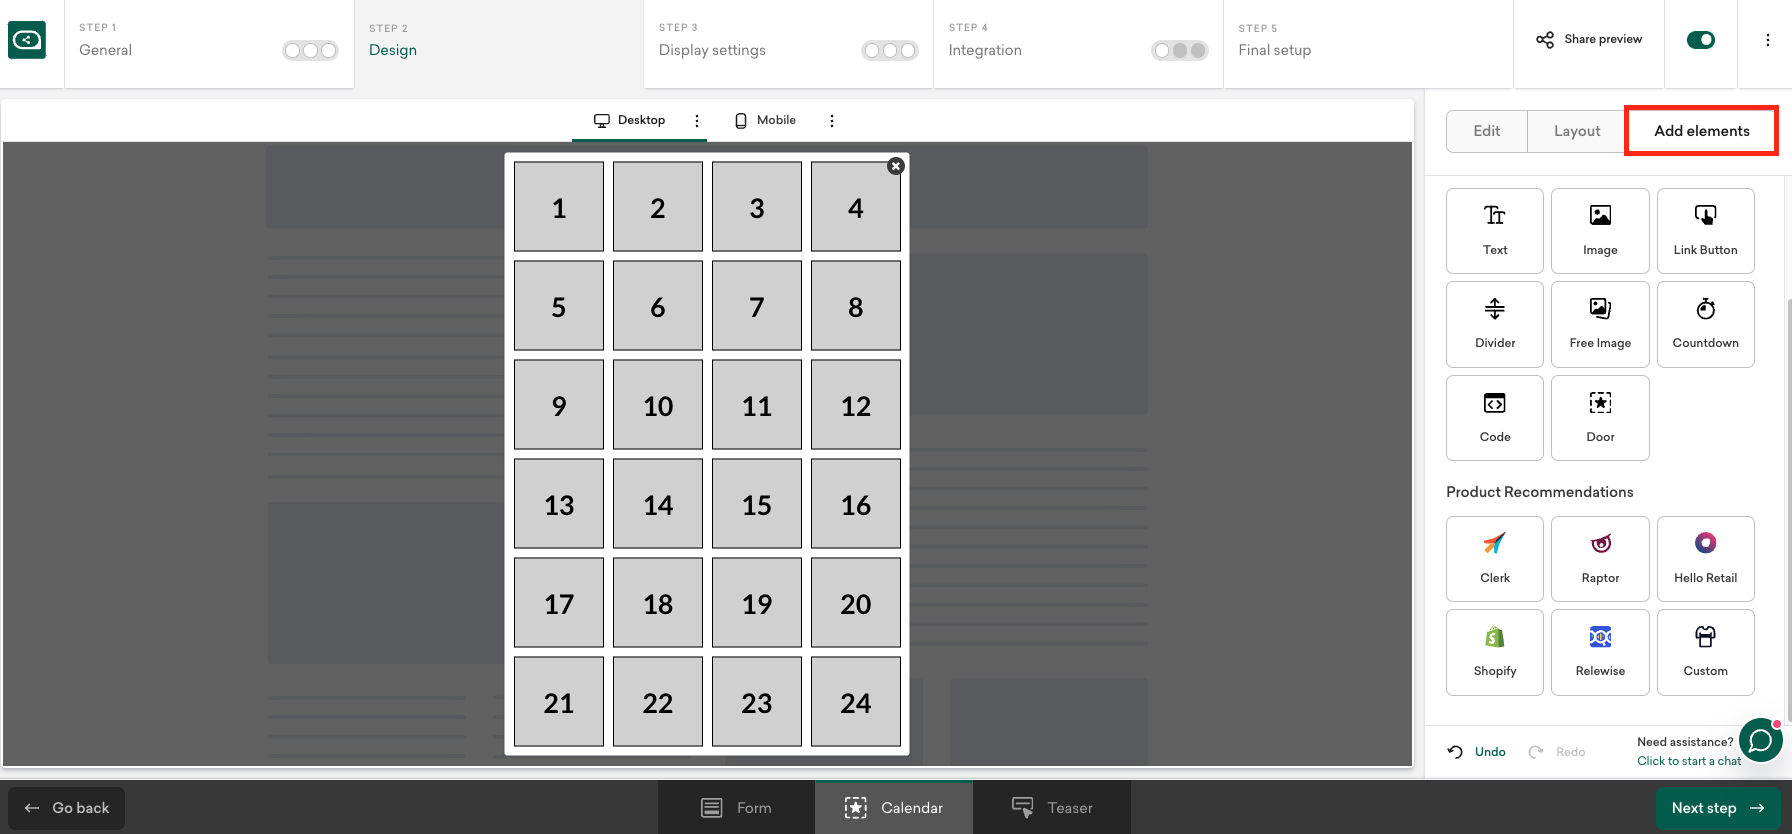
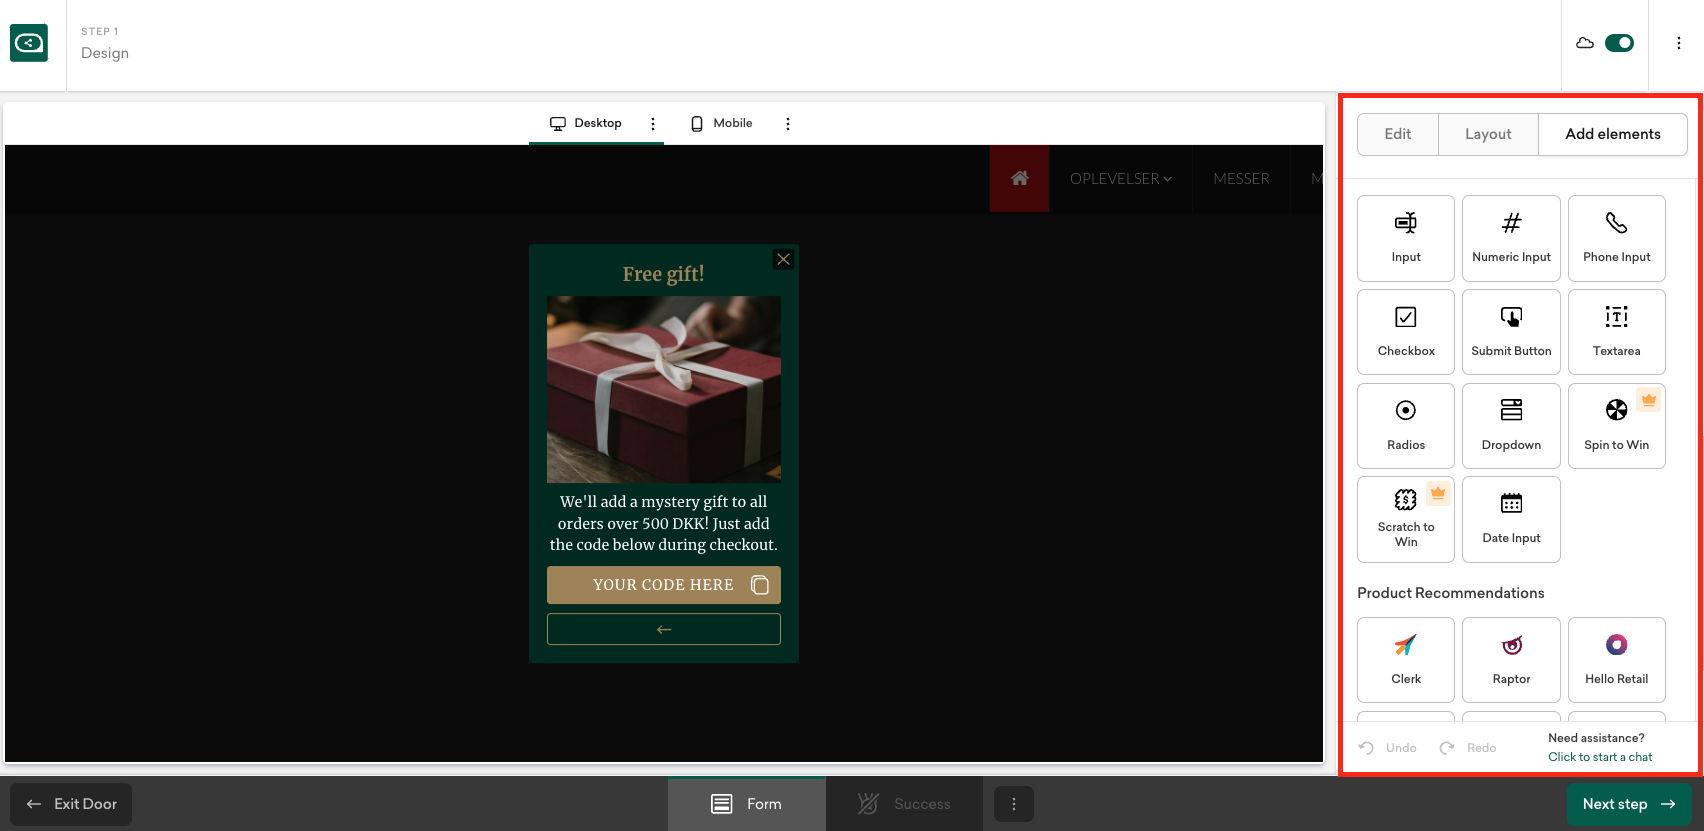
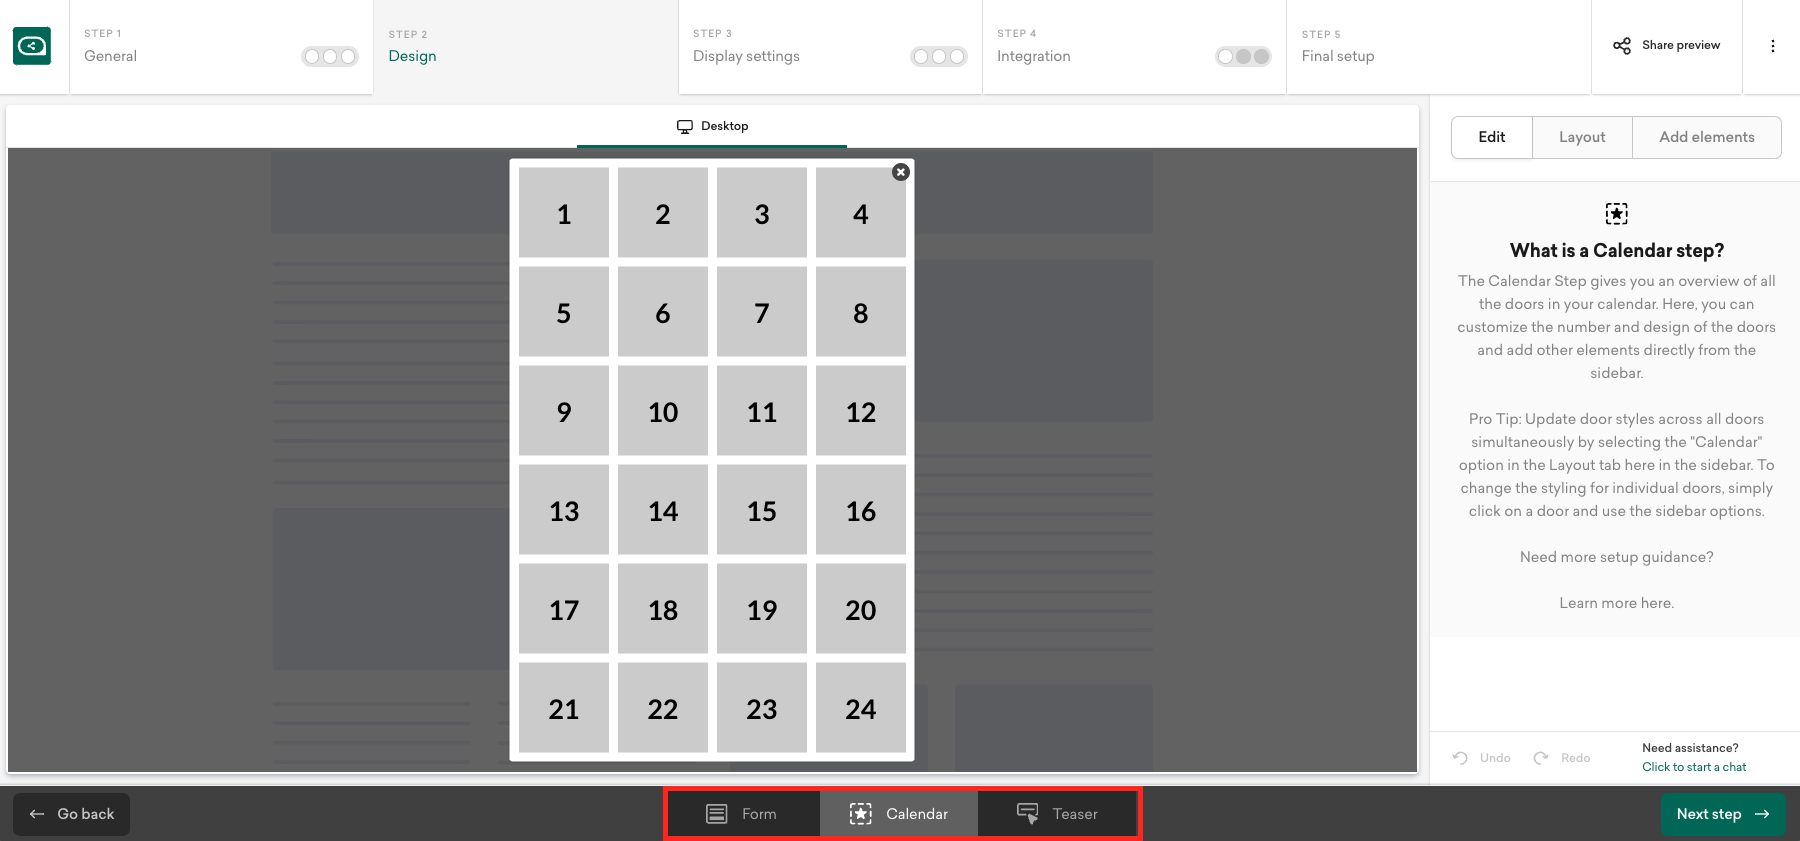 You can easily customize your calendar by adjusting its size, adding text elements, setting a background image, or rearranging door positions. All available elements can be found in the right-hand menu under "Add elements," where you can simply drag and drop the elements you’d like to include.
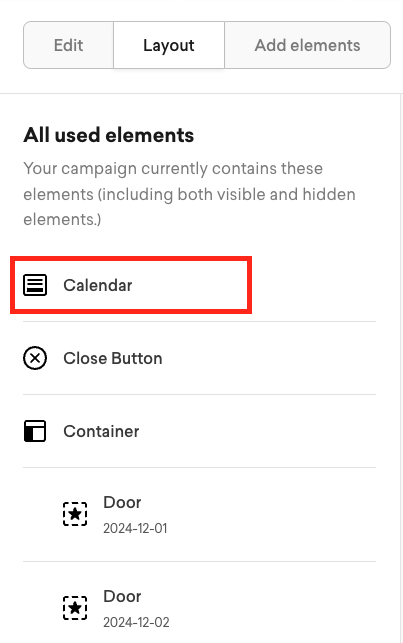
In the "Layout" section you'll find an overview of all the elements in your calendar. Here, you can select individual doors and customize their specific designs. If you prefer a uniform design for all doors, go to the "Calendar" section to apply the design to all doors at once.
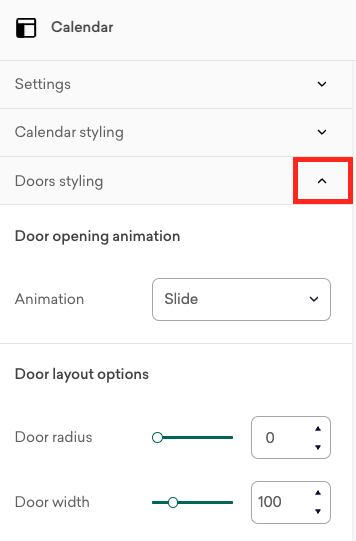
To style all doors, unfold "Doors styling". Here you can decide which animation the doors should have when opening up and style door layes, text, borders, width, hight etc.
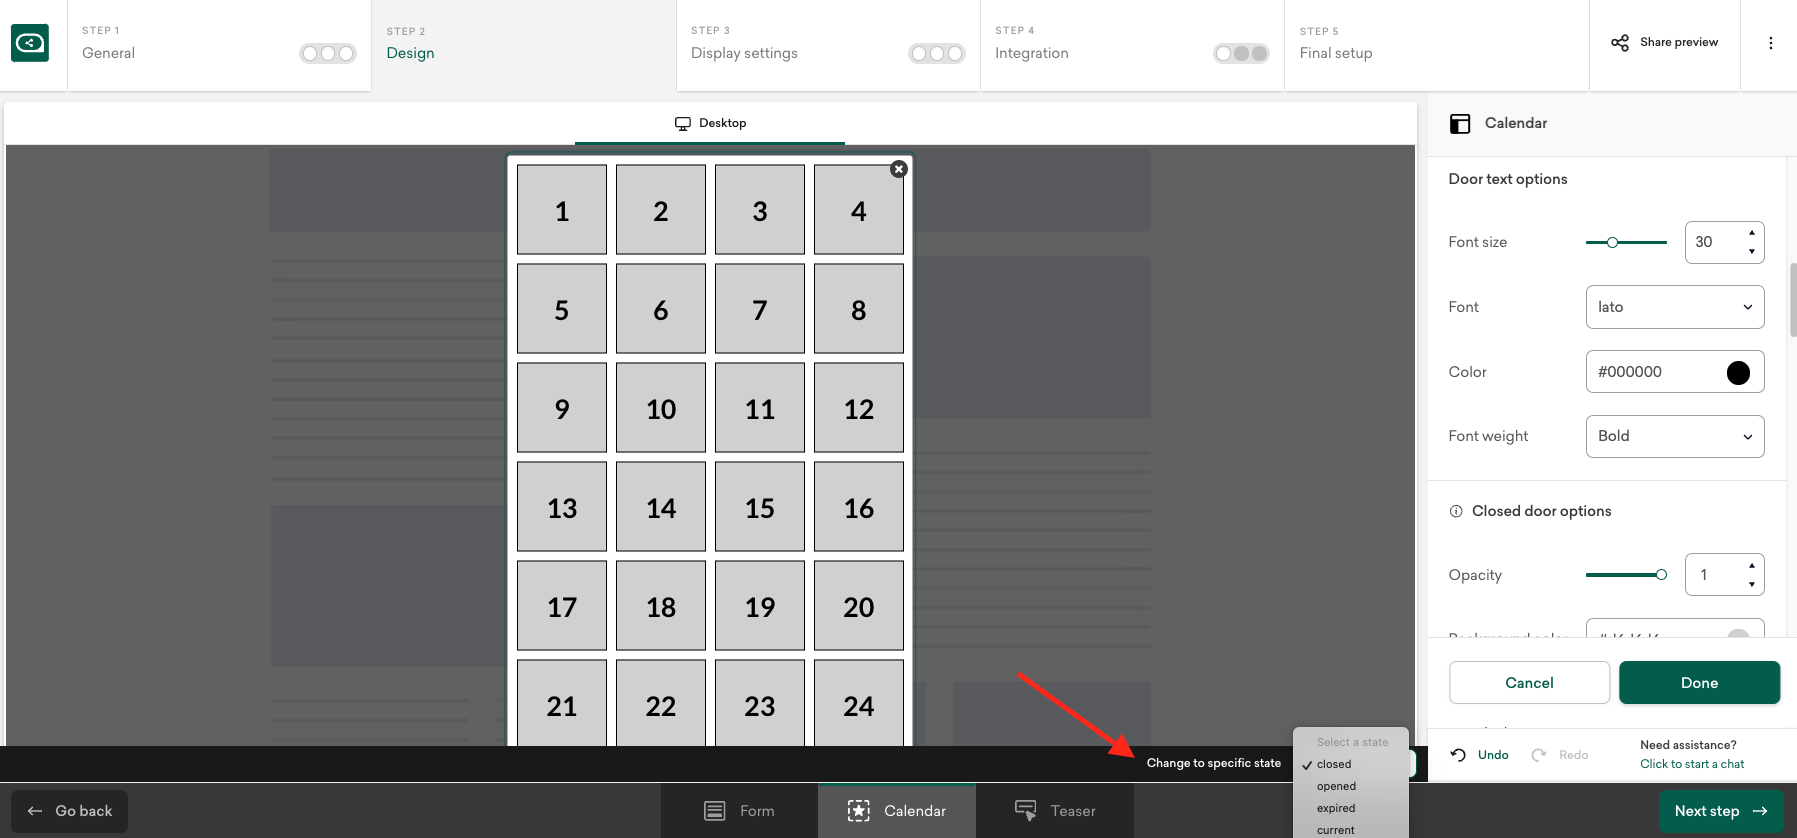
A door can have a different design depending on its state, and you can customize each state individually.
-
Closed Door – Add an image or color to all closed doors.
-
Opened Door – Define how the door appears when opened; here, you can add an image or set a background color.
-
Current Door – Highlight today’s door with an image, color or border color.
-
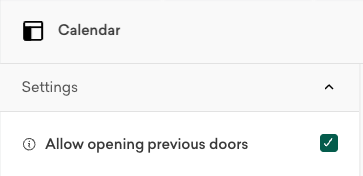
Expired Door – Show visitors which doors have already been opened by adding a color or image. You can also choose whether expired doors can be reopened. To do so, mark the checkbox under "Setting"
In the bottom right corner, you can switch between the different states of the door to get an idea of how it will look on the calendar.
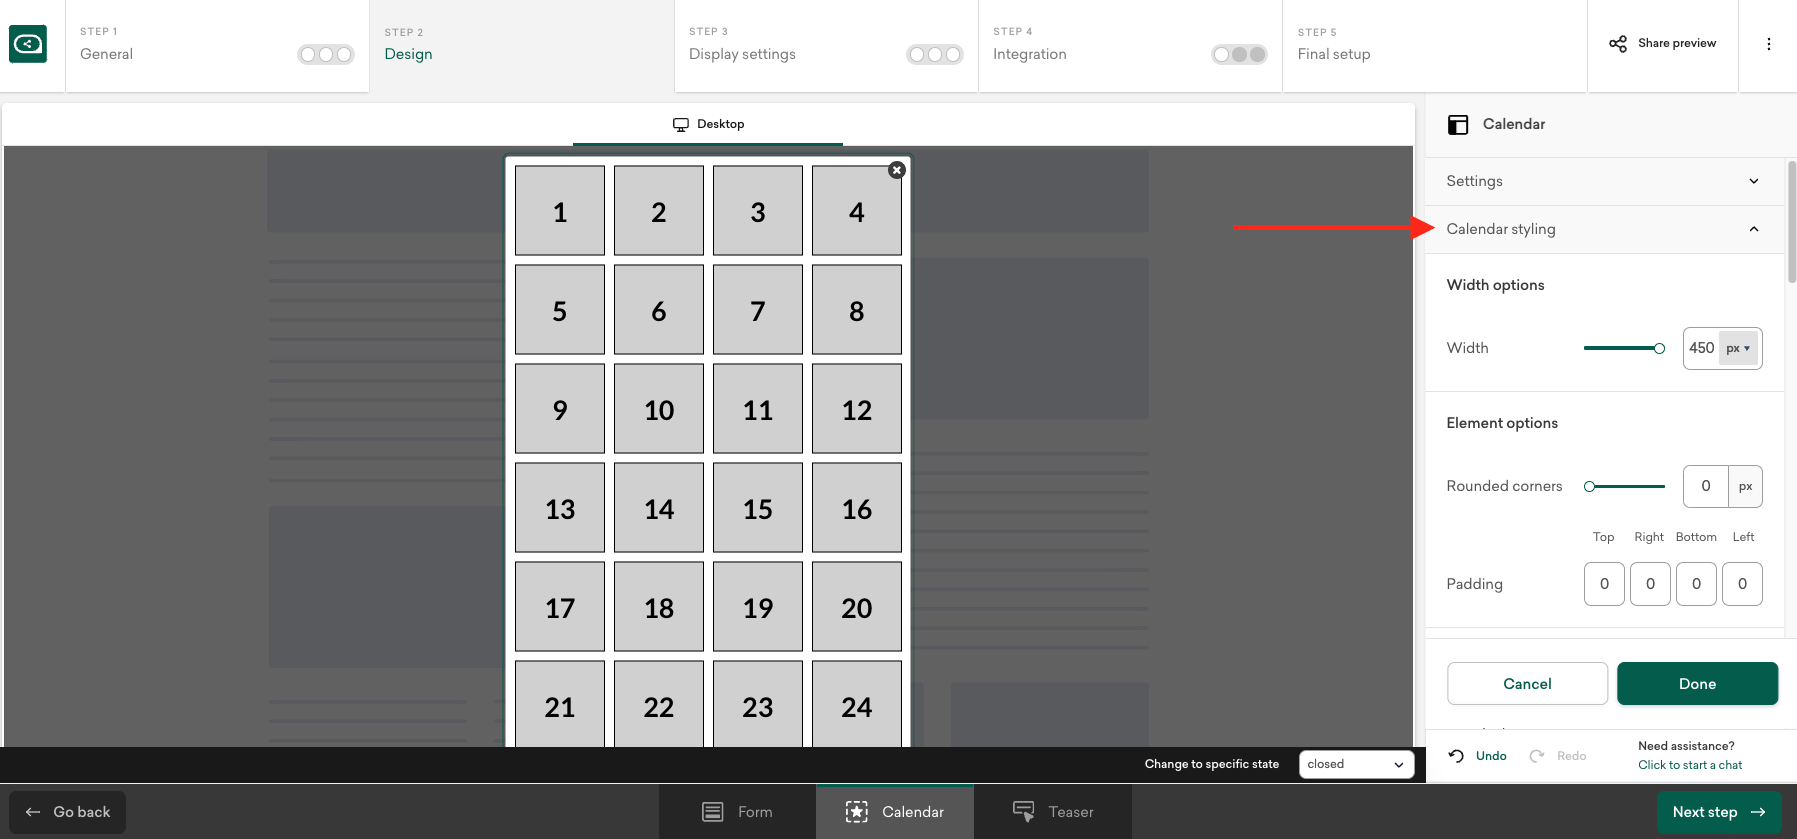
Style your calendar with a background image, border, rounded corners etc by unfolding the "Calendar settings".
💡 Hint: If you want to use the calendar as an advent calendar with 4 doors, a Black Week campaign with 7 door etc. you can easily delete the doors you don’t need and adjust the dates on each remaining door.
Calendar layout on mobile
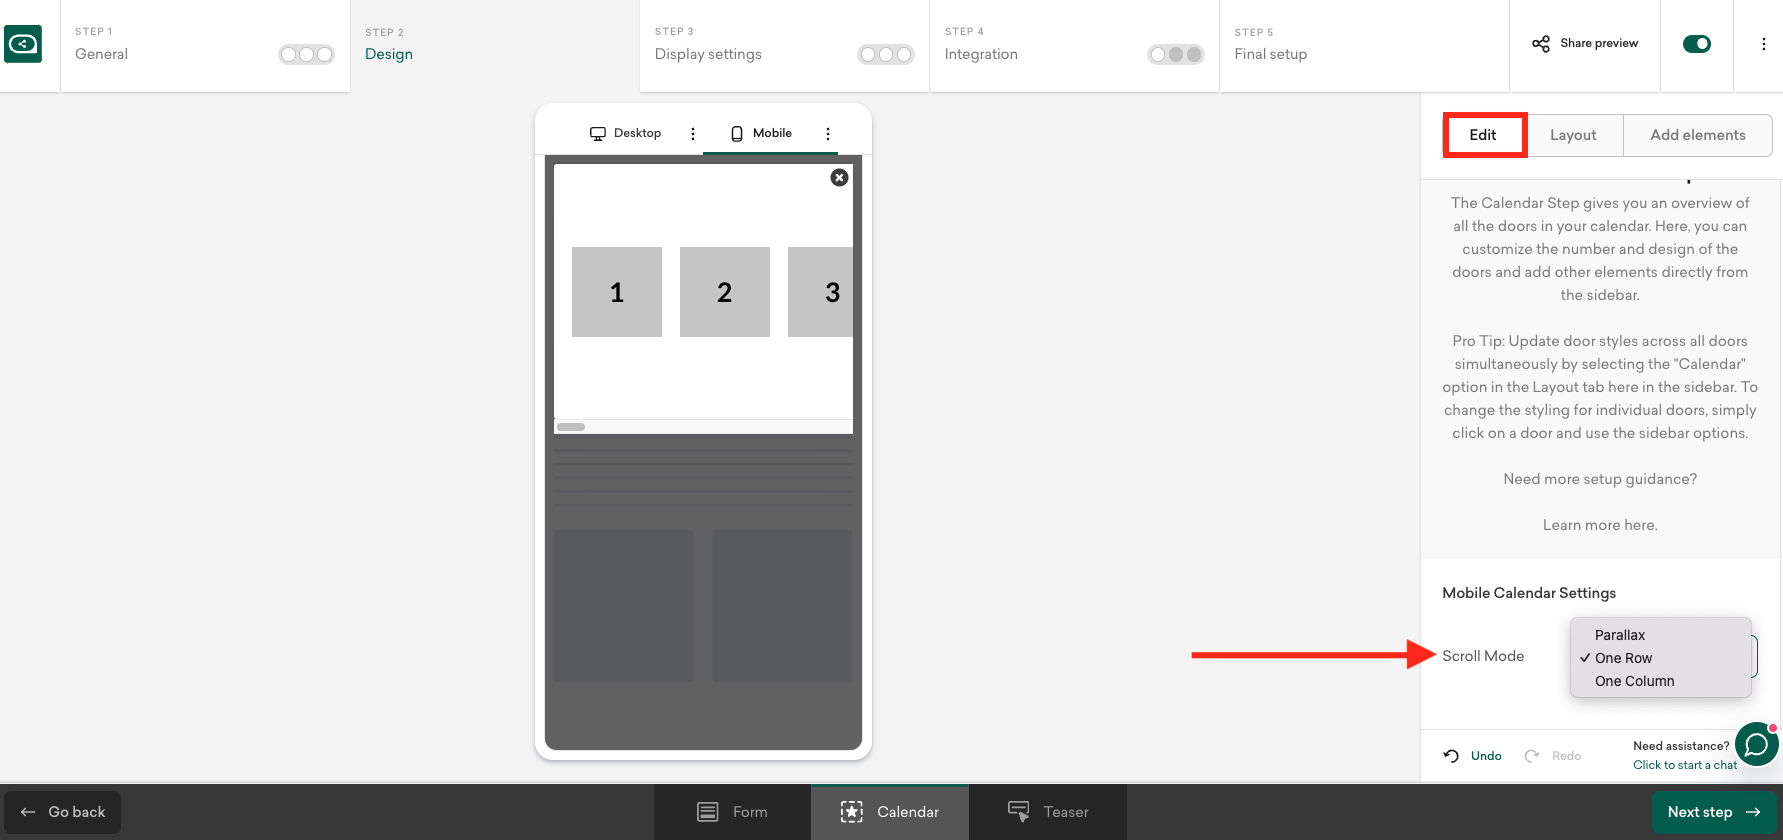
On mobile you can display the doors in three different ways; in a row, in a column or in a parallax (coming soon). It will automatically show today's date but you can easily scroll back and forward between the different doors. You can edit the layout in the right-hand menu under "Edit".
Calendar Campaigns
Behind each door is a new campaign. To edit a campaign, click directly on the door in the calendar or go to "Layout" in the right-hand menu, select the specific door, and click "Edit door content." A new campaign editor will open, where you can drag and drop element from the "Add element" section. You can include a discount code, display a specific offer, add input fields, or even offer interactive elements like a Spin-to-Win wheel or a scratch card to give them a chance to win a prize or different discounts.
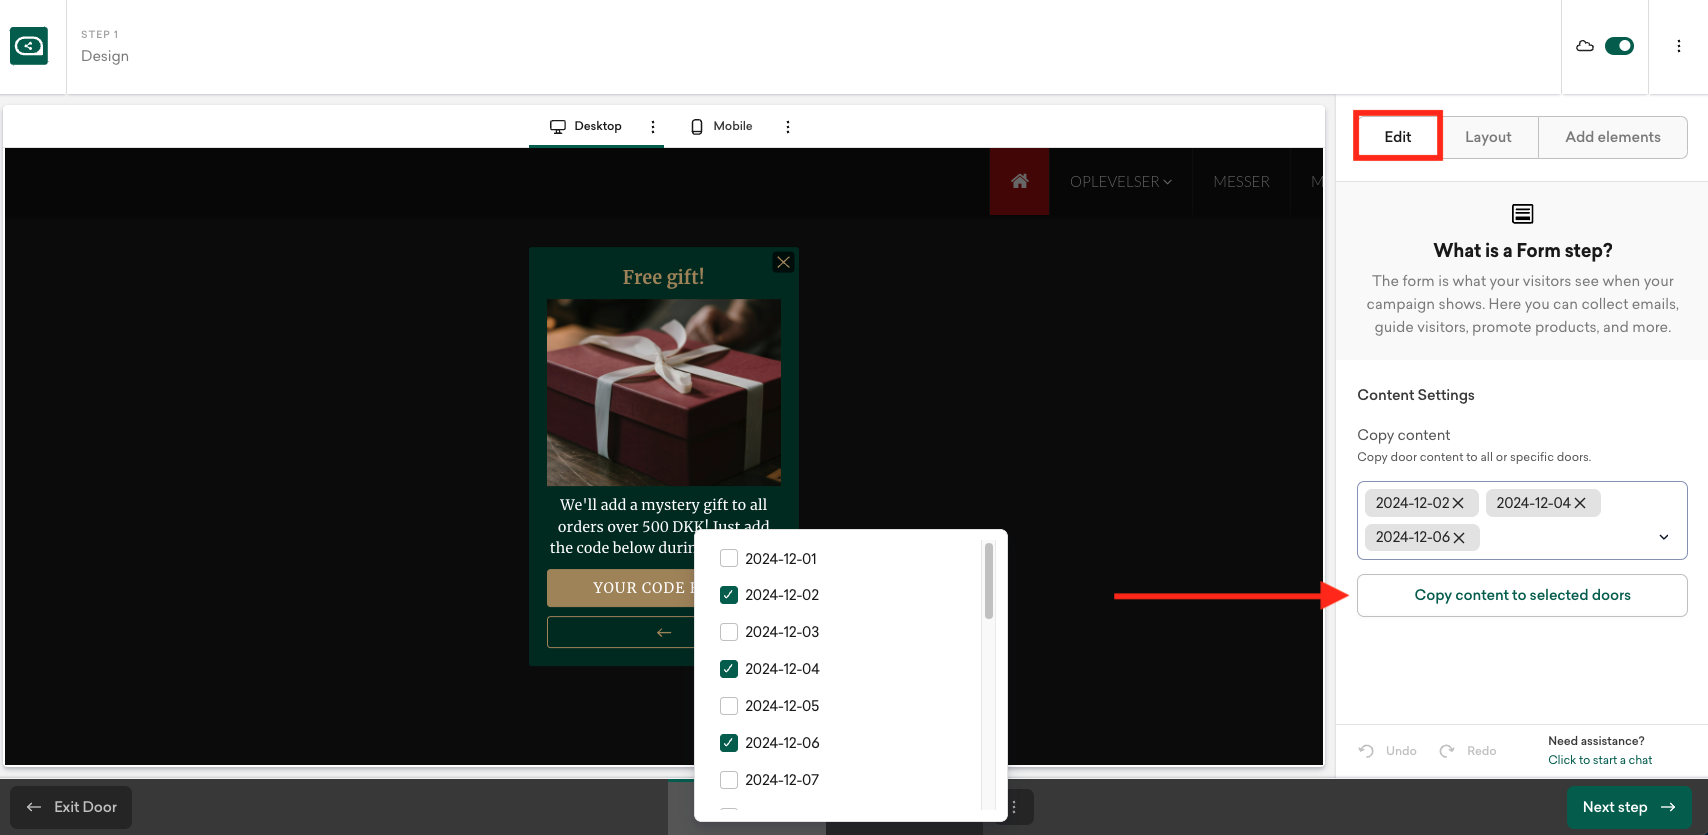
If you want to use the same design for multiple doors, you can do so under "Edit." Simply select the dates you want from the dropdown menu and click "Copy content to selected door."
Copying designs across different campaigns makes creating the calendar much faster, as you won’t need to design 24 individual campaigns.
💡 Remember to design the "Success step" as well as the mobil view.
When you are done click "Exit door" in the bottom left corner to go back to the calendar.
Set up your integration
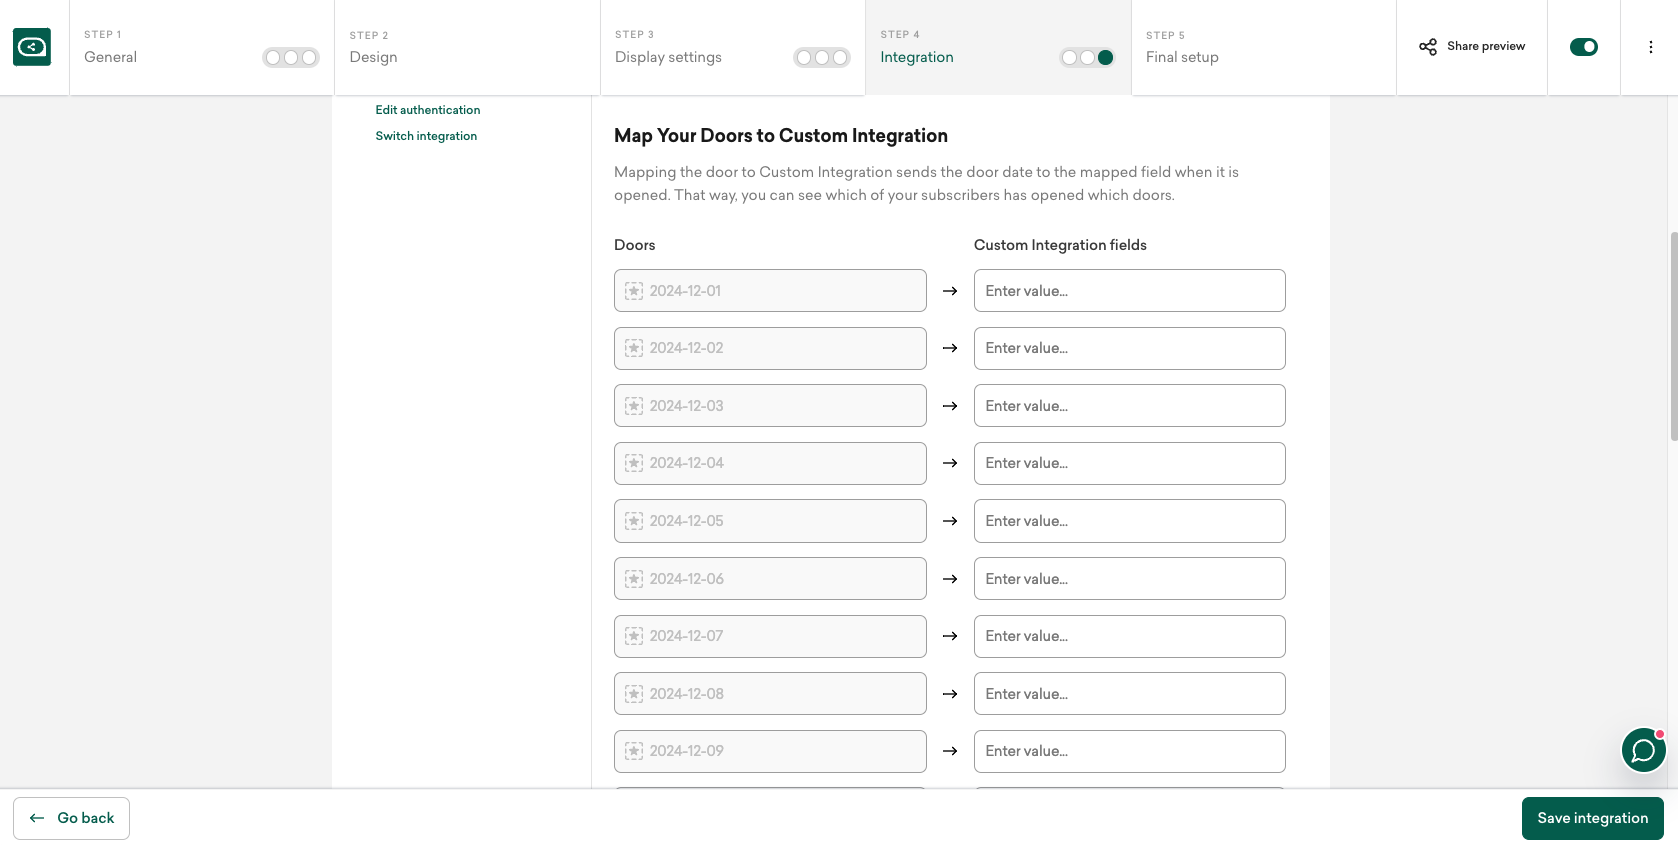
To pass the calendar data onto your email system, make sure to set up an integration with your email provider.(Check out our step-by-step guides to learn how to connect Sleeknote to your email system.) Use the mapping step of your integration setup to match your Sleeknote campaign fields with your ESP fields.
Map your doors to you ESP to send the door date to the mapped field when it is opened. That way you can see which of your subscribers has opened which doors.
Now save your campaign and activate it when you are ready.
You can easily customize your calendar by adjusting its size, adding text elements, setting a background image, or rearranging door positions. All available elements can be found in the right-hand menu under "Add elements," where you can simply drag and drop the elements you’d like to include.