With our Advanced Scheduling option, you can easily activate and deactivate your campaigns ahead of time.
You can set up your campaigns to run for both fixed and repeating periods.
The first one is ideal for running holiday-specific campaigns for a limited period, while the second option is useful for showing different messages during and outside of your office hours.
How to Set Up a Fixed Schedule
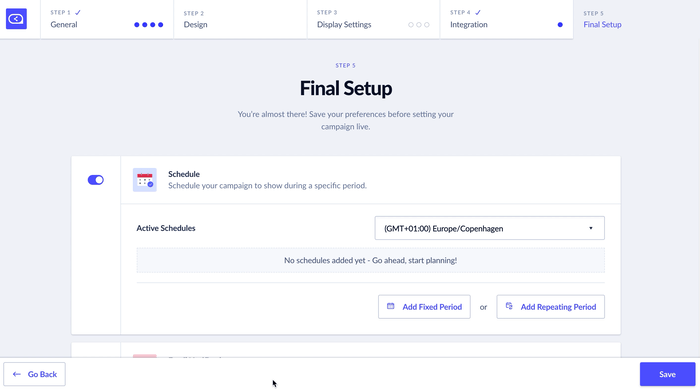
If you want your campaign to show between specific dates and hours, you can set up a fixed schedule in the final step of your Campaign Builder.

Enter your start date and time (or choose from the calendar) and set an end date for your campaign (optional):
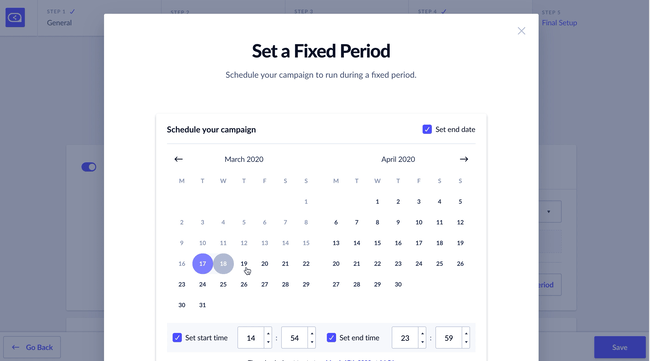
Hit “Save Schedule” to save and exit.
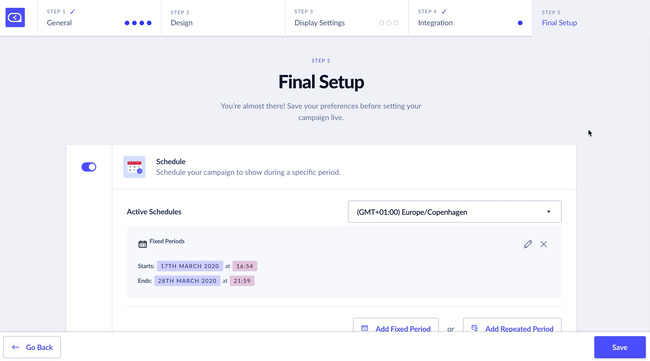
Now you can see all your active schedules, and edit or remove them easily in the same step.
How to Set Up a Repeating Schedule
If you want to show your campaigns at a recurring schedule, such as every weekday or each Sunday in odd weeks, you can find this option in the same step of the Campaign Builder.
By using this option, you can choose the days, weeks, start and end times your campaign should show.
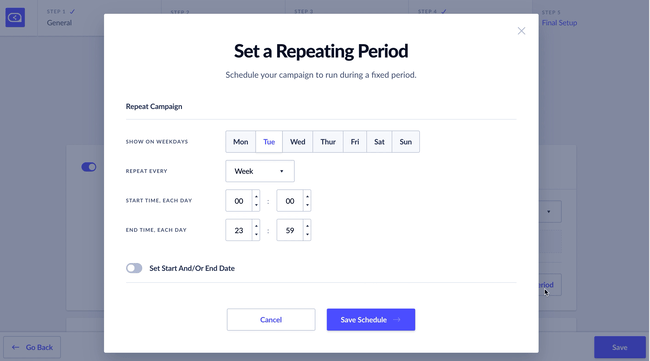
By clicking the “Set Start And/Or End Date” option, you can limit your repeating schedule by certain dates.
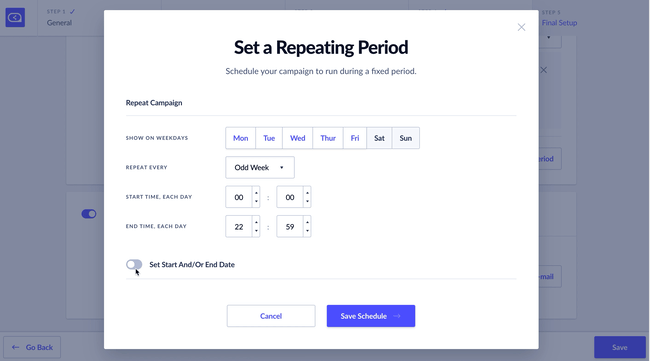
For example, your campaign can show every weekend between 09:00 and 23:59, until the end of June, if you decide to run a seasonal, weekend-only sales campaign.
Campaign status
On the Campaign page you can see the status for each campaign. A campaign can be active, inactive or scheduled. When a campaign has a schedule, it will show as a sub-status on the campaign page that indicates if the campaign is:
- Scheduled (will activate again)
- Ended (will not activate again)
If you hover over the schedule status, a tooltip with the schedule information will appear.
Need more ideas? Check out this page: